(Die Seite wurde neu angelegt: „<h2 style="{{Style:Hauptseite:Überschrift}}" align="center">DMXControl 3 Lektionen</h2> <div style="{{Style:Hauptseite:Box}} background-color:#f5faff"> <!-- Rech…“) |
Keine Bearbeitungszusammenfassung |
||
| Zeile 1: | Zeile 1: | ||
<h2 style="{{Style:Hauptseite:Überschrift}}" align="center">DMXControl 3 | <h2 style="{{Style:Hauptseite:Überschrift}}" align="center">DMXControl 3 Tutorial</h2> | ||
<div style="{{Style:Hauptseite:Box}} background-color:# | <div style="{{Style:Hauptseite:Box}} background-color:#ffffff"> | ||
<!-- Rechte Spalte --> | <!-- Rechte Spalte --> | ||
<div class="floatright" style="width: 78%; margin-top:-8px;"> | <div class="floatright" style="width: 78%; margin-top:-8px;"> | ||
= kopie 1:1 von der englischen Version, damit dies Übersetzt werden kann. = | = kopie 1:1 von der englischen Version, damit dies Übersetzt werden kann. = | ||
| Zeile 106: | Zeile 105: | ||
{{DMXC3_lesson}} | {{DMXC3_lesson}} | ||
</div> | </div> | ||
{{Languages|Einsteiger:lesson8}} | {{Languages|Einsteiger:lesson8}} | ||
Version vom 5. Mai 2011, 07:44 Uhr
DMXControl 3 Tutorial
kopie 1:1 von der englischen Version, damit dies Übersetzt werden kann.
Übersicht
Szenen (cues) sind das wichtigsten elemente in deiner Lichtshow. Hier wird das sehr mächte Szenenkonzept von DMXControl 3 beschrieben. Die Begriffe "Cue" und "Szene" wird als Synonym verwendet.
Lecture 8: Scenes (cues) and scene lists
Each scene needs a "host container"- that's a scene list. Therefore you have to create at first one or more scene lists by clicking the button "Create scenelist" which you can find in the project explorer main menu. Of course, the created scene list will appear in the folder "Scene list".
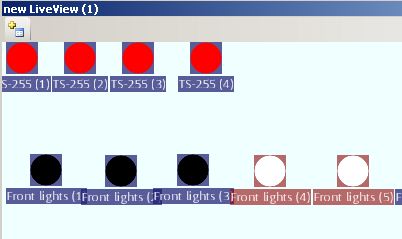
You can open this new scene list with a double click on the object in the project explorer or using the context menu item "open". Next step is to create a new scene. For creating a new cue we will change the color of the moving lights to "red" (please open the shutter too) and we turn on the two middle front lights.
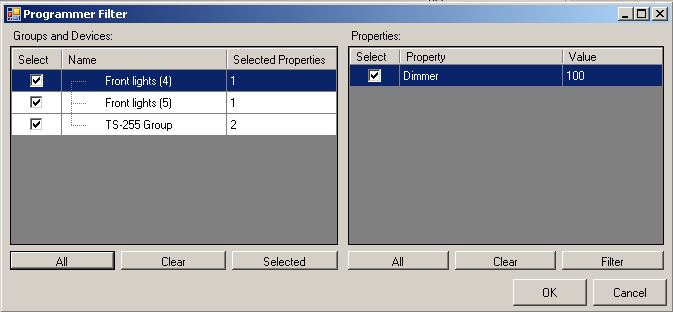
Return to the scene list panel and press the Store cue button. At first the programmer filter tool will appear where you can manually influence which devices and which attributes should be really taken over into the new scene. Typically you can confirm without modification.
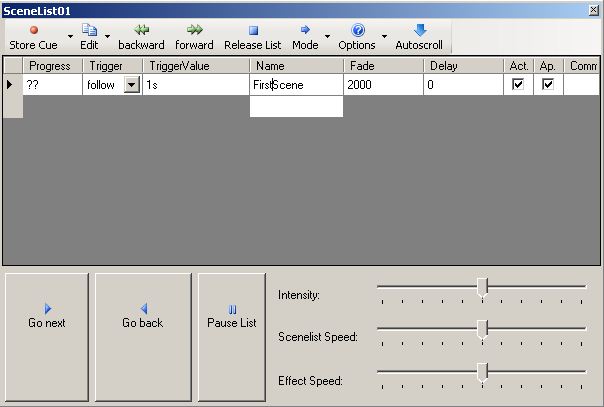
The result is your first cue (scene) in your scene list. You should change the name of the cue thus you can remember laterly what is the reason and target of this cue (e.g. "First Scene", "Start cue", "ML to red", etc.)
In following table we explain the meaning of cue attributes (which you can see in the scene list header:
| Attribute | Description | Example |
|---|---|---|
| Progress | shows status of scene during execution of scene list | in percent |
| Trigger | relation to predecessor cue, use "follow" as default | see lesson 11 |
| Trigger Value | see lesson 11 | |
| Name | free name of scene | should explain the content of cue |
| Fade | fade-in value | in milli seconds |
| Delay | delay ? | ? |
| Act. | is this cue active or should it be ignored? | default: active |
| Ap. | ? | ? |
| Comment | for free use, insert explaining words |
In the same way you can create some more cues and store it in the scene list.
topics to be added (by beta testers)
Excercise
- Generate your own cues
- Try the buttons "All", "Clear" and "Selected" in the programmer filter
- Work with different fade times
Additional links and references
Certificate
I have understood the topics of this lecture and want to continue with next course: Lecture9: Fanning and other effects


