| Zeile 10: | Zeile 10: | ||
==Lektion2: Das Panel-Konzept der DMXControl 3 Benutzeroberfläche== | ==Lektion2: Das Panel-Konzept der DMXControl 3 Benutzeroberfläche== | ||
DMXControl 3 stellt eine Menge von Funktionen und Fenstern zur verfügung. Für verschiedene Anwenderfälle sind auch jeweils andere Fenster wichtig. Aus diesem Grund nutzt DMXControl 3 ein flexibeles Panel-System, mit dem du deine eigene Anordnung erstellen kannst. | DMXControl 3 stellt eine Menge von Funktionen und Fenstern (Panels) zur verfügung. Für verschiedene Anwenderfälle sind auch jeweils andere Fenster wichtig. Aus diesem Grund nutzt DMXControl 3 ein flexibeles Panel-System, mit dem du deine eigene Anordnung erstellen kannst. Die Fenster in der Benutzeroberfläche können vom Hauptfenster gelöst werden oder an den oberen, unteren, linken oder rechten Fensterrand geheftet werden. Diese Flexibilität ermöglicht es Dir die Benutzeroberfläche einfach oder genau auf deine Bedürfnisse zugeschnitten zu gestalten. Klicke dazu einfach auf ein Fenster und ziehe den Mauszeiger über den Transparenten Pfeil um die Form an den gewünschten Platz an zu docken. Ein Panel kann auch den übrigen Platz in der Mitte einnehmen. | ||
[[Datei:DMXC3L02 PanelAssignment.jpg|600px]] | [[Datei:DMXC3L02 PanelAssignment.jpg|600px]] | ||
| Zeile 19: | Zeile 16: | ||
Hier sind einige Erklärungen: | |||
* | * Ein "freies" Fenster ist eines, dass an keiner Seite angeheftet ist | ||
* A pane is a container for several forms. | * Ein Feld ist ein Sammelpunkt für mehrere Fenster ?!? (A pane is a container for several forms) Bitte überarbeiten, ich weiß was gemeint ist, kennne die Begriffe aber nicht. LetzFetz | ||
* | * Das Symbol mit den Andockmöglichkeiten zeigt an, wo ein Fenster angedockt werden kann. Es ist sowohl im Hauptfenster als auch in jedem Feld ? verfügbar. Die mögliche Position eines Fenster wird durch ein blaues Rechteck angezeigt. | ||
* | * Alle Fenster werden über das Betriebssystem (z.B. Microsoft Windows) erstellt und können über das "X" in der oberen rechten Ecke geschlossen werden. Das "X" schließt immer nur das aktive Fenster. Sollte es mehrere Fenster in einem Feld geben, so bleiben alle anderen Fenster weiterhin geöffnet. | ||
* | * Die Reißzwecke (Senkrecht) ist das kleine Symbol, dass erscheint, wenn ein Fenster dauerhaft angezeigt wird. Klickt man auf die Reißzwecke, so wird dieses Fenster ausgeblendet und erscheint erst dann wieder, wenn man das dazugehörige Symbol am Bildrand klickt. | ||
* | * Felder ? aufteilen - Ein Feld ? kann auch in 2 verschiedene Felder geteilt werden | ||
* | * Felder teilen - Verschiedene Fenster teilen sich ein Feld, wobei lediglich das oberste angezeigt wird. Die anderen sind dann ausgeblendet | ||
===Panes=== | ===Felder (Panes)=== | ||
Ein Feld kann mehr als eine Form unterbringen. Ein Feld wird automatisch erzeugt, wenn weitere Fenster in ein Feld eingebettet werden. Alle Fenster werden durch einen Tab (?) angezeigt. Ein Klick auf den Tab und das entsprechende Fenster wird angezeigt. | |||
Es gibt verschiedene Möglichkeiten für das lösen eines Fenster aus dem Hauptfenster um ein freies zu bekommen. | |||
* | * Nach der Erzeugung ist es schon gelöst | ||
* | * Doppelklicke auf den blauen oder grauen Kopf des Fensters um es zu lösen | ||
* | * Doppelklicke auf den Tab (?) eines eingebetteten Fensters | ||
* | * Klicke und halte die linke Maustaste gedrückt und ziehe den Kopf des Fensters auf die gewünschte Position | ||
* | * Klicke auf einen Tab (?) und halte die linke Maustaste gedrückt und ziehe das Fenster an die gewünschte Position | ||
Ein freies Fenster kann jederzeit überall hingezogen und angedockt werden. | |||
Selbst in jedem freien Fenster gibt es die Möglichkeit des Andockens und der Aufteilung. | |||
===Felder aufteilen=== | |||
By dragging the floating window and positioning your mouse cursor near the pane internal docking suggestion, you can get the two windows to split the space in half and see both, but with only half the space each. This can be done vertically or horizontally. | By dragging the floating window and positioning your mouse cursor near the pane internal docking suggestion, you can get the two windows to split the space in half and see both, but with only half the space each. This can be done vertically or horizontally. | ||
Version vom 20. Mai 2011, 15:30 Uhr
DMXControl 3 Lektion 2
Überblick
In dieser Übung wirst du lernen wie man mit dem Panel-System von DMXControl 3 umgeht. Du kannst die Panels beliebig anordnen und die Konfiguration speichern und wiederherstellen.
Lektion2: Das Panel-Konzept der DMXControl 3 Benutzeroberfläche
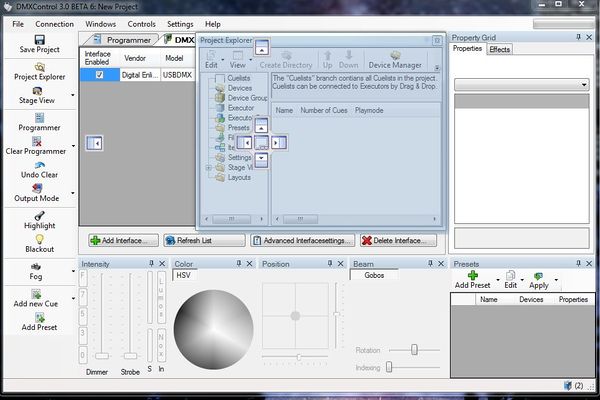
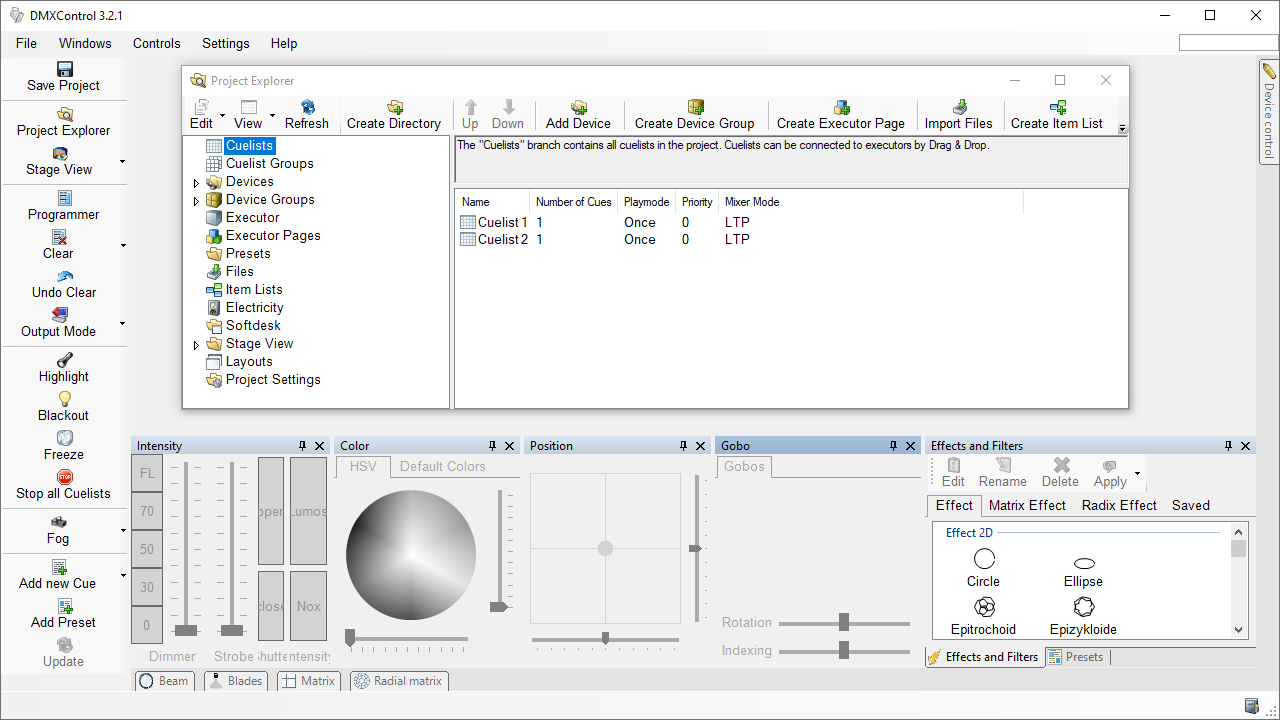
DMXControl 3 stellt eine Menge von Funktionen und Fenstern (Panels) zur verfügung. Für verschiedene Anwenderfälle sind auch jeweils andere Fenster wichtig. Aus diesem Grund nutzt DMXControl 3 ein flexibeles Panel-System, mit dem du deine eigene Anordnung erstellen kannst. Die Fenster in der Benutzeroberfläche können vom Hauptfenster gelöst werden oder an den oberen, unteren, linken oder rechten Fensterrand geheftet werden. Diese Flexibilität ermöglicht es Dir die Benutzeroberfläche einfach oder genau auf deine Bedürfnisse zugeschnitten zu gestalten. Klicke dazu einfach auf ein Fenster und ziehe den Mauszeiger über den Transparenten Pfeil um die Form an den gewünschten Platz an zu docken. Ein Panel kann auch den übrigen Platz in der Mitte einnehmen.
Hier sind einige Erklärungen:
- Ein "freies" Fenster ist eines, dass an keiner Seite angeheftet ist
- Ein Feld ist ein Sammelpunkt für mehrere Fenster ?!? (A pane is a container for several forms) Bitte überarbeiten, ich weiß was gemeint ist, kennne die Begriffe aber nicht. LetzFetz
- Das Symbol mit den Andockmöglichkeiten zeigt an, wo ein Fenster angedockt werden kann. Es ist sowohl im Hauptfenster als auch in jedem Feld ? verfügbar. Die mögliche Position eines Fenster wird durch ein blaues Rechteck angezeigt.
- Alle Fenster werden über das Betriebssystem (z.B. Microsoft Windows) erstellt und können über das "X" in der oberen rechten Ecke geschlossen werden. Das "X" schließt immer nur das aktive Fenster. Sollte es mehrere Fenster in einem Feld geben, so bleiben alle anderen Fenster weiterhin geöffnet.
- Die Reißzwecke (Senkrecht) ist das kleine Symbol, dass erscheint, wenn ein Fenster dauerhaft angezeigt wird. Klickt man auf die Reißzwecke, so wird dieses Fenster ausgeblendet und erscheint erst dann wieder, wenn man das dazugehörige Symbol am Bildrand klickt.
- Felder ? aufteilen - Ein Feld ? kann auch in 2 verschiedene Felder geteilt werden
- Felder teilen - Verschiedene Fenster teilen sich ein Feld, wobei lediglich das oberste angezeigt wird. Die anderen sind dann ausgeblendet
Felder (Panes)
Ein Feld kann mehr als eine Form unterbringen. Ein Feld wird automatisch erzeugt, wenn weitere Fenster in ein Feld eingebettet werden. Alle Fenster werden durch einen Tab (?) angezeigt. Ein Klick auf den Tab und das entsprechende Fenster wird angezeigt.
Es gibt verschiedene Möglichkeiten für das lösen eines Fenster aus dem Hauptfenster um ein freies zu bekommen.
- Nach der Erzeugung ist es schon gelöst
- Doppelklicke auf den blauen oder grauen Kopf des Fensters um es zu lösen
- Doppelklicke auf den Tab (?) eines eingebetteten Fensters
- Klicke und halte die linke Maustaste gedrückt und ziehe den Kopf des Fensters auf die gewünschte Position
- Klicke auf einen Tab (?) und halte die linke Maustaste gedrückt und ziehe das Fenster an die gewünschte Position
Ein freies Fenster kann jederzeit überall hingezogen und angedockt werden.
Selbst in jedem freien Fenster gibt es die Möglichkeit des Andockens und der Aufteilung.
Felder aufteilen
By dragging the floating window and positioning your mouse cursor near the pane internal docking suggestion, you can get the two windows to split the space in half and see both, but with only half the space each. This can be done vertically or horizontally.
Pane Sharing
As an alternative to pane-splitting, you can get your windows to share a space – they will share a single pane. You choose the form to be seen from the tabs displayed at the edge of the pane. Drag the floating form so the mouse cursor is over the top of the form. There are two slight variations on this, depending on the original form occupying the space. The form can be:- Docked on the side Filling the spare space in the middle (a ‘Document’ form)
If you add more forms to the pane than there is room to display the tab, the left and right arrows become active and can be used to show the tabs that are hidden.
Hideaway Forms
When you click the push-pin at the top of the forms next the close-down ‘X’, it falls over. The form becomes ‘unpinned’ and appears to slide off the edge of the screen. The remaining screen re-arranges itself and the space previously taken by the hideaway form is shared out amongst the nearby forms. (CHECK:::The push-pin applies to the PANE, not to a single window in it. When forms are sharing a pane they are hidden or revealed together./CHECK)
In this panel configuration the left, right and buttom panel are used. The left panel is a splitted one. The right panel containes 3 auto-hide windows (see tab strip). The Live view window is floating.
Auto-Hide
DockPanel has an auto-hide feature that enables valuable screen real estate to be preserved. If there is any auto hide window, DockPanel will display a tab strip on the out-most edge. Auto hide window has 3 statuses: hide, mouse-hover-display and click-display. In hide status, only the tab is displayed. The window itself is completely hidden. That can preserve the valuable screen to display more information.
Further information
The handling of different panels is based on Dockpanel suite of Weifen Luo. [1]
topics to do be added (by beta testers)
- describe how to save a panel configuration
- add screenshots
- show examples
Excercise
- Create a new form (Menu "Windows") and dock and relaese it at several positions
- Save and reload a panel configuration.
Additional links and references
I have understood the topics of this lecture and want to continue with next course: Lektion3:

